Black & White Adjustment layer to alter color
We have discussed various methods of adjusting color in images before. In this article we are going to explain one more extra option to alter the color in images within the least possible time and the highest precision. We are going to use adjustment layers for color correction. This may not be new to some of us, but for those who don’t know, you will surely appreciate it.
All that’s involved in this case is to create a Black & White adjustment layer. Then you change the blend mode to Luminosity. Finally, you use the color sliders to make the desired alternations on the colors. That’s it.
We will describe these steps in more detail below.
Step 1: open the image of which you want to alter the color in Photoshop
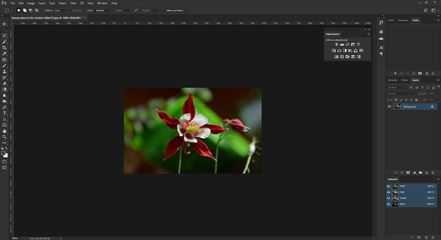
In this case, we’ve chosen the colorful image of a flower and opened it in Adobe Photoshop.

Step 2: Create a Black & White adjustment layer
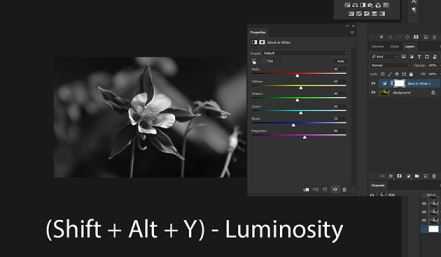
To create a Black & White adjustment layer, we go to Layer -> New Adjustment layer -> Black & White. Don’t change the settings, only change the name if you prefer to. Press OK. This converts the image to grayscale.

Step 3: Change the blend mode
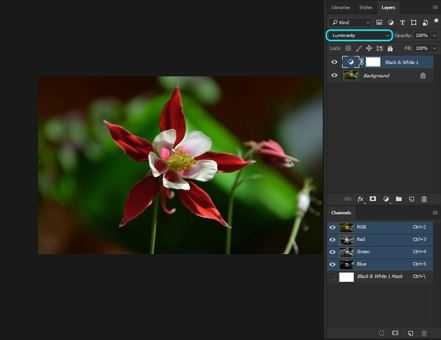
By default the blend mode of the layer is set to normal. To bring back the color to the image, change the blend mode from ‚Normal‘ to ‚Luminostity‘. You can get the same result by using the shortcodes Shift + Alt + Y. You’ll see the color coming back to the image.

Step 4: Adjust the luminosity of the colors
Adding the Black & White adjustment layer only effects the brightness value of the background layer and not the saturation of the colors.
Now, with the Black & White adjustment layer open, we can bring some more details on the petals of the flower. To do that, we go to the red slider on the adjustment layer and move it to the left or to the right. If we want to adjust the other colors of the image, we do the same with the corresponding color sliders. Apparently, what we are doing is making changes based on a very narrow range of colors, with some simple clicks and slides. This means that the changes can be very subtle if we want.
Advantages of working with adjustment layers
You ay wonder why you should use an adjustment layer instead of working with a filter or applying effects direcly to the image. Adjustment layers are usually better than using other options because they will remain editable in later days, after changes are made to image.
The result
Once all adjustments are done and you are satisfied with the end result, it’s easy to add a layer mask and brush in or out as desired. The layer mask gives you the option to apply the adjustment layer to only a part of the image. This gives you even more options to play with the colors of an image!
Questions?
Call +31 (0)168-472 177 or send us an email. Our image editing experts are happy to help you out.
