Mastering Quick and Smooth Selections in Photoshop
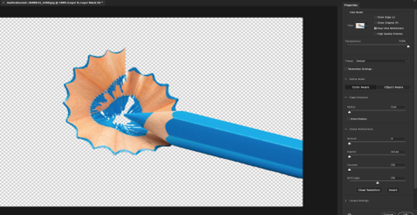
Creating smooth and precise selections in Photoshop is essential for achieving professional looking edits. In this blog post, we’ll walk you through a fast and effective technique to make your selections. We use the image below to demonstrate how it works.
Step 1: Open the Image and Choose Your Tool
Start by opening the image in Photoshop. Once opened, navigate to the toolbar and select either the Quick Selection Tool or the Magic Wand Tool.
Step 2: Initial Selection Using the Magic Wand Tool
Make an initial selection of the background. To refine the selection, invert it by pressing Ctrl + I (Cmd + I on Mac) and then create a mask from the layer palette.
Step 3: Address Jagged Edges
Although the selection looks good, placing it on a black background may reveal jagged edges, giving it an unnatural appearance. To resolve this issue, we’ll utilize the magic sliders. Double-click on the layer mask to reveal the global refinement features.
Step 4: Refinement
Focus on the Smooth slider. Increase the smoothness until jagged lines disappear. If there are bumps that need smoothing, adjust the value to around 8-10. Additionally, enhance the feather to create an even transition, using a value around 3px. Don’t be overly concerned about the edges; instead, increase the contrast to sharpen them. You can also shift the edge using a value of around 60%. Once satisfied, click the “OK” button.
Step 5: Witness the Results
Take a look at the final output with a smooth edge. The selection integrates with the new background, providing a polished and professional finish.
Conclusion
Mastering the art of quick and smooth selections in Photoshop can significantly enhance the overall quality of your edits. By using these techniques into your workflow, you’ll be able to achieve good results with minimal effort. Experiment with different images and refine your skills to take your Photoshop proficiency to the next level.


